 Skip to content


Good SMP dot spacing is irregular, not measured out like a grid. Dots sit close enough to read as density from a distance, and far enough apart that each one stays a separate dot after healing. Too even looks like a pattern. Too tight merges into a dark patch. Too loose looks like thin hair, not a shaved head.
There is no single magic number in millimetres, because the right gap depends on your skin, your remaining hair, your pigment and the depth the technician works at. This guide explains what spacing is meant to do, how it changes across sessions, and how to judge it on your own scalp.
TL;DR
- Natural spacing is random. Dots in lines or regular grids look artificial, and published clinical guidance says dots should be placed irregularly with distance kept between them.
- Overcrowded dots can turn patchy as they diffuse over time, so a tighter first session is not a shortcut to density.
- Density is built in layers across sessions. Early spacing looks sparse on purpose.
- Judge spacing only once the scalp has fully healed, not in the first days when the skin is still settling.
- Dot size, depth and spacing work as one system. Fixing one without the others rarely helps.
Table of Contents
- What dot spacing actually does
- Why irregular beats even
- Tight spacing is not the same as density
- How spacing changes across sessions
- When to judge the result
- Spacing, depth and dot size work as one system
- Spacing by area of the scalp
- Existing hair, scars and skin tone change the plan
- Warning signs your spacing is off
- Our perspective
- How to check a clinic’s spacing before you book
- Book a consultation with us
- FAQ
- Sources
What dot spacing actually does
Scalp micropigmentation works like a stippled painting. Tiny dots placed between pores on a balding scalp imitate the look of cut hair shafts, as the SMP standardization study in the research literature describes it. Your eye does not count dots. It reads the overall contrast between pigment and skin.
Spacing controls that contrast. Think of it as the dial between two failures:
- Too wide: the skin shows through, and the result reads as thinning hair rather than a closely cropped head.
- Too tight: dots touch and blend, giving a flat, solid block that looks like a painted-on shadow.
- Too even: even a correct average density looks fake if every dot is the same distance from its neighbors.
A real shaved scalp is not uniform. Follicles grow in clusters of one to four hairs, some areas are denser than others, and the hairline is soft and uneven. Good SMP copies that irregularity. We cover the other half of the equation in our guide to SMP dot size, because spacing and size cannot be judged separately.
Why irregular beats even
The clinical guidance is direct on this point: linear placement or a regular grid looks unnatural, and the dots should be laid down irregularly (Dhurat et al., via PubMed Central).
In practice that means a technician works in small random clusters, varies the gap between dots, and avoids marching along the scalp in rows. Rows are the most common tell. They are invisible up close in the chair, then obvious in a photo at head height under bathroom lighting.
A useful self-check with a mirror and good daylight:
- Step back about an arm’s length from the mirror.
- Look for any direction in the pattern, such as lines, diagonals or a checkerboard.
- Look for pockets where dots seem to cluster into spots, and pockets that look bare.
- Compare left and right. Perfect symmetry is not the goal, but the density should feel similar.
If you see a visible pattern at arm’s length, the spacing is too regular. If you only see it with your nose to the mirror, it is probably fine.
Tight spacing is not the same as density
It is tempting to ask for the dots to be packed in for a darker, fuller result. This usually backfires. Research on SMP technique notes that overcrowding can look patchy as dots diffuse over time (source).
The reason is that every dot spreads a little as it heals and settles. A dot placed with a clean gap on day one may have almost touched its neighbor by month six. If the gap was already tiny, the dots fuse into blotches, and the area looks darker and flatter than the one beside it.
So a skilled technician leaves room. The result looks slightly under-filled right after the first session. That is by design, and it is what keeps the healed result crisp.
How spacing changes across sessions
SMP is normally built in layers over several sessions rather than finished in one sitting. The first pass lays down a base of well-spaced dots. Later passes add dots in the gaps, strengthen areas that healed lighter, and refine the hairline and edges.
This matters for spacing because the gaps are not fixed. A good plan treats the gaps from session one as space reserved for later layers. Practitioners differ in how many sessions they plan and how far apart they book them, and the right plan depends on your scalp, your skin tone, and how short you want to wear your hair. Ask your technician what they plan to do in each pass and why.
Two things happen between sessions:
- The pigment settles. Some dots fade, which opens up gaps you could not see on the day.
- Your skin shows how it holds pigment. Some scalps retain very well, others lighter. That tells the technician where to add and where to leave alone.
If you are on session two and think the dots still look sparse, that is usually the plan working. If you are on session one and the dots already look crowded, speak up before the next pass, not after it.
Our breakdown of the SMP process session by session walks through what each visit is meant to achieve.
When to judge the result
Do not assess spacing in the first days. Fresh pigment looks darker, sharper and sometimes larger than it will be, and the skin can be red or flaky, which distorts the contrast. A dot that looks bold on day eight can look right at full healing.
A practical rule most clinics follow: judge the dots and spacing once the scalp has fully healed after the session, which is commonly a matter of weeks, and judge the final result only after the last session has settled. Take photos in the same light at the same distance each time so you compare like with like, and bring them to your next appointment.
People posting in SMP forums often ask about dots that look like they are “blowing out” a week after the first session. Without seeing the scalp it is impossible to say, but one week is too early to conclude. The sensible move is to message your technician with clear photos and ask them to review it at the next visit.
Spacing, depth and dot size work as one system
Spacing cannot be fixed in isolation, because the depth of the pigment changes how big each dot becomes. The research describes the ideal as pigment in the papillary dermis. Superficial pigment may wash off in about three to four weeks, while deep placement can diffuse, enlarge the dots and cause a patchy appearance (source).
So a technician can space dots perfectly and still deliver a blurry result if the pigment sits too deep. Likewise, correct depth with sloppy spacing gives clean dots in an obvious pattern.
Two more technique details affect how the dots read:
- Needle choice. Single-pronged needles are typically used at the hairline to create fine dots, while triple-pronged needles cover broader areas (source). That is why the hairline can have a different feel and spacing from the crown.
- Angle. Needles inserted at 90° produce round dots, rather than linear or oval marks (source). An angled needle drags and stretches the dot, which then looks like a tiny dash and breaks the illusion at close range.
Spacing by area of the scalp
The same density does not suit every zone.
| Area | What spacing should do | Common mistake |
|---|---|---|
| Hairline | Soft, irregular, with fine dots that thin out toward the forehead | A hard, dense line that looks drawn on |
| Temples | Gradual, slightly sparser edge that matches natural recession | Overfilling and closing the temple angle |
| Mid-scalp | Even-looking coverage with random variation | Visible rows or a flat uniform tone |
| Crown | Follows the whorl and varies in density | Patches of dots following a circle |
The hairline is the most unforgiving zone, because it sits in the middle of your face. A conservative design with sparse, fine dots at the front ages far better than a dense, low line. If you are weighing a lower hairline, read how we think about age-proofing a low hairline.
Existing hair, scars and skin tone change the plan
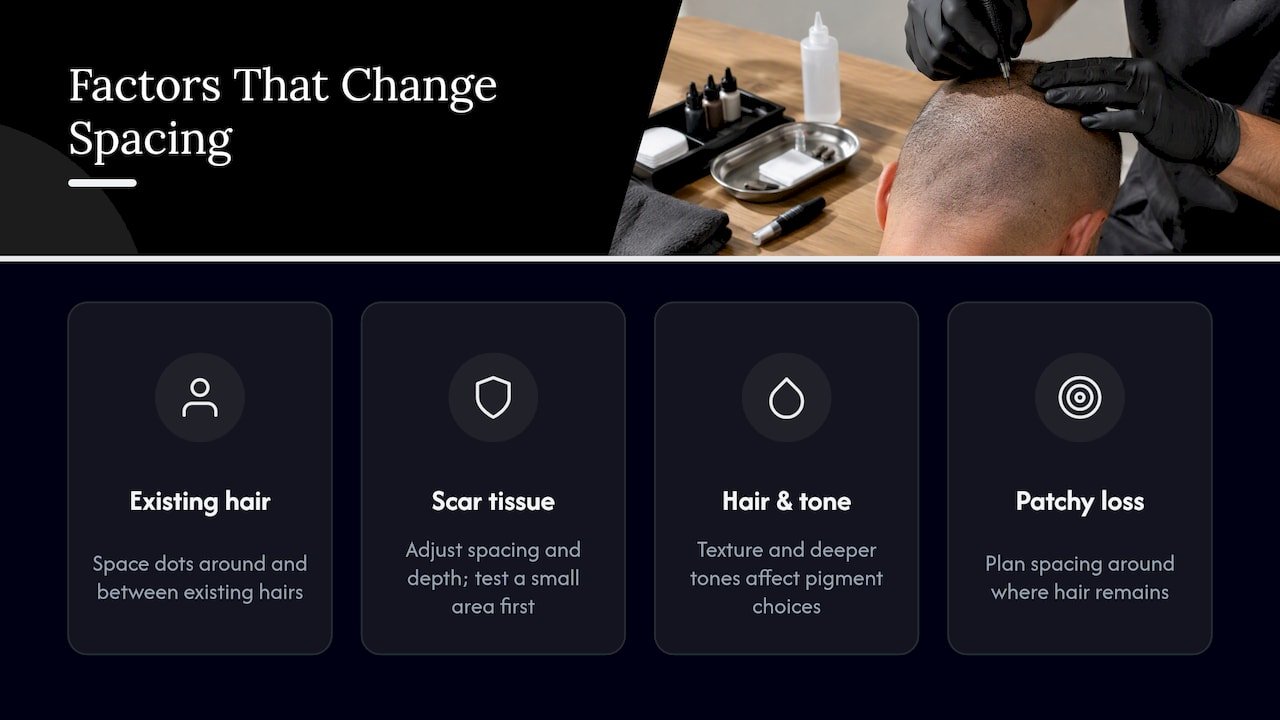
If you still have some hair, the technician spaces dots around and between the existing hairs so the pigment blends with them. Over-packing near real hairs makes the transition obvious when the real hair grows longer or greys.
Scar tissue holds pigment differently, so spacing and depth often need adjustment, and a small test area first is sensible. See our notes on SMP on scar tissue after a transplant. Textured hair and deeper skin tones also change needle and pigment choices, which we explain in our piece on Afro-textured SMP. For people with patchy hair loss, SMP for alopecia raises its own spacing questions around where hair is present.
SMP is also not the only non-surgical option for thinning hair. Some people pair it with treatments that aim to support existing hair, such as PRP hair restoration, and then use SMP to add visual density where hair no longer grows. The pigment spacing is planned around the hair you keep.
Warning signs your spacing is off
Use this list after the scalp has healed:
- Visible lines or grid. The pattern is too regular.
- Dark clumps or blotches. Dots were packed too tight or placed too deep and have merged.
- Dots larger than your natural follicles. The needle, depth or technique may be wrong. Our dot size guide shows what to compare against.
- A hard edge at the hairline. The front dots are too dense and too uniform.
- Obvious bare skin between dots at normal distance. The density was never built up, or the pigment faded more than planned.
Some of these are correctable. Sparse areas can be filled in. Dots that are too big or too deep are harder, and may need lightening before any rework. If you are in that position, look at how we approach fixing a failed hair transplant with SMP, which uses the same careful, layered thinking.
Our perspective
We see spacing problems from two directions: people who come to us at the start, and people who come to correct work done elsewhere. The corrective cases teach the most. Almost always, the issue was an attempt to look dense too soon, with dots packed tightly, placed deep, and laid in a regular rhythm.
Our approach is conservative. We would rather you leave a session slightly under-filled and add in the next one than push density early and live with it permanently. We choose pigment to suit your skin and hair, replicate the look of real follicles, and plan around how the result will look once it has healed, not how it looks on the day.
That is also why we document healed work. Fresh photos tell you very little about spacing, and heavily edited photos tell you even less. If a clinic cannot show healed results, ask why, and see our checklist for spotting AI-edited SMP.
— James Christopher
How to check a clinic’s spacing before you book
- Ask for healed photos taken at least several weeks after the final session, ideally in natural light and from several distances.
- Look at close-ups and full-head shots. Spacing that holds up in both is well executed.
- Ask about the session plan. A good answer explains what each pass adds, not just how many there are.
- Ask about needle and depth. You are not testing jargon, you are testing whether they have a reasoned answer.
- Ask how they handle a result you are not happy with. Their answer tells you how they will treat you after the money changes hands.
If you are a man in Toronto or the GTA weighing options, our page on scalp micropigmentation for men and the male pattern baldness treatment explain what we do. Women with diffuse thinning have different spacing needs, covered on our female SMP page.
Book a consultation with us
We are a clinic in Vaughan, Ontario, serving Toronto, the GTA, the rest of Canada, the United States and international clients who travel to us. Scalp micropigmentation with us is published at 3,000 to 4,000 CAD, one-off. You can see how the treatment works and book there, or start from our home page. If you already have SMP you are unhappy with, send us healed photos and we will tell you honestly what can be done.
FAQ
Is two sessions of SMP enough?
For some people, yes, and for others a third pass is needed to build density or refine the edges. It depends on the area covered, your skin, how short you wear your hair and how the pigment heals. Your technician should be able to explain the plan before the first session.
How can I tell if my SMP dots are too close together?
Wait until the scalp is fully healed, then look from arm’s length in daylight. If dots have merged into dark clumps or a flat block, they were likely too tight or too deep. Overcrowding can look patchy as dots diffuse over time, so bring healed photos to your technician.
Should SMP dots look the same size and distance apart everywhere?
No. Natural hair is irregular, and evenly spaced dots look like a grid. The hairline typically uses finer dots and softer, sparser spacing than the mid-scalp or crown.
Can sparse spacing be fixed later?
Usually, yes. Adding dots to fill in light or sparse areas is a standard part of building density across sessions. Dots that are too large or too deep are harder to correct, which is why starting conservatively matters.

